Even in a house equipped with the “Invisible Shield,” breakthrough infections—like a seasonal flu or a stomach virus brought home from a business trip—can occur. For an entrepreneur, a family illness is a bottleneck. The goal of this protocol is to contain the “biological fire” to a single room, preventing a household-wide shutdown and ensuring a rapid return to productivity.
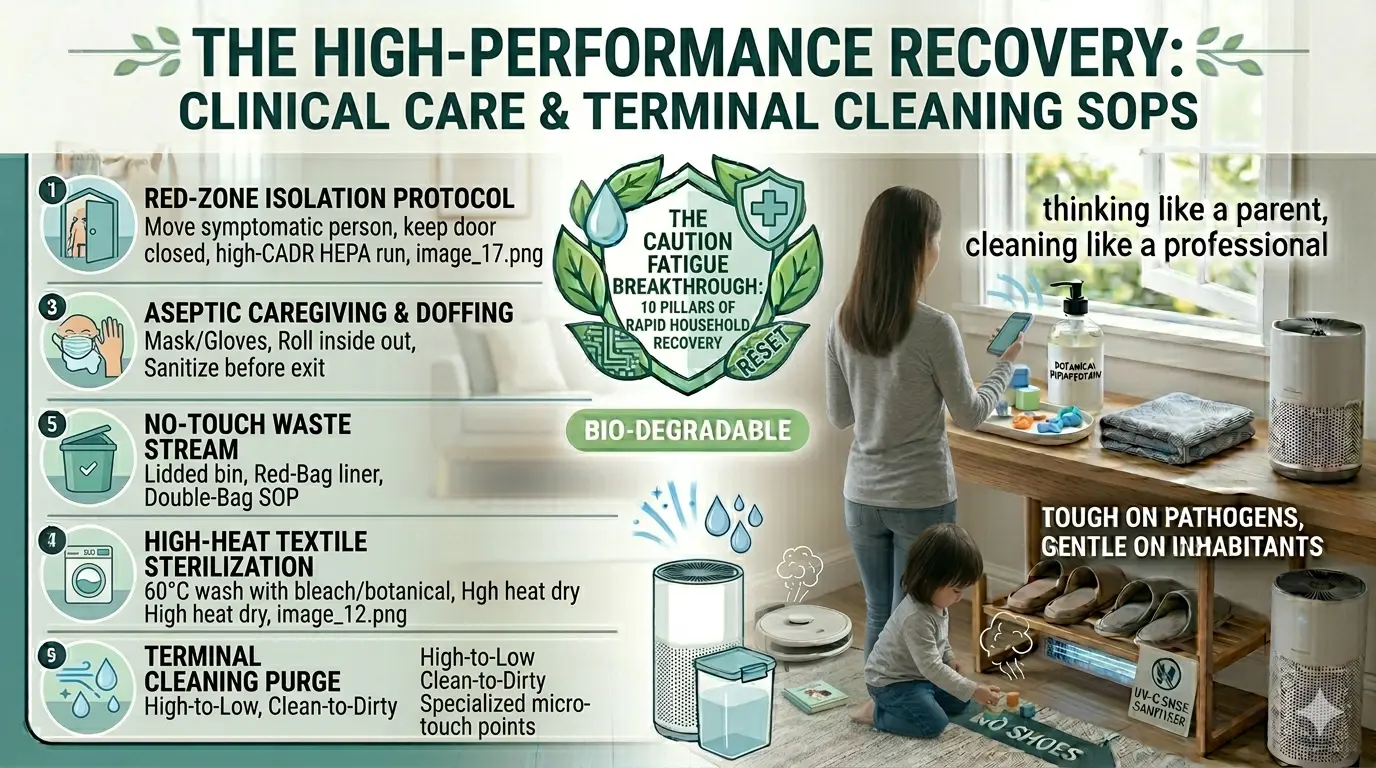
Infection control during an active illness requires a shift from “preventative” to “reactive” clinical care. By implementing these 10 pillars of Recovery and Terminal Cleaning, you manage the viral load with the precision of a professional facility.
1. The “Red-Zone” Isolation Protocol
When a family member shows symptoms, they must be moved immediately to a pre-designated isolation room (ideally one with an en-suite bathroom).
- The Air Barrier: Keep the door closed at all times. Place a HEPA air purifier inside the room and set it to its maximum CADR (Clean Air Delivery Rate) to capture aerosolized viral particles at the source.
- The “No-Cross” Rule: No communal items (pillows, tablets, chargers) should leave the room until they have been through a “Terminal Sanitization” cycle.
2. Aseptic Caregiving and PPE Doffing
The person providing care is the most likely bridge for the virus to reach the rest of the household.
- The Armor: The caregiver should wear a high-filtration mask (N95) and disposable gloves when entering the room.
- The Doffing Sequence: Remove gloves first, rolling them inside out. Sanitize hands. Remove the mask by the straps only. Sanitize hands again before exiting the “Red-Zone.”
3. “No-Touch” Waste Stream Management
Waste from a sickroom (tissues, wipes, disposable masks) is highly infectious “bio-waste.”
- The Double-Bag SOP: Use a lidded, foot-operated bin lined with a “Red-Bag” or marked liner. Before taking the trash out of the room, seal the first bag and place it into a second clean bag held by someone outside the door (the “Clean Partner”).
- Surface Guard: Disinfect the exterior of the final bag before moving it to the outdoor waste collection area.
4. High-Heat Textile Sterilization
Viruses like Norovirus or Influenza can persist in bedding and towels for days.
- The Laundry Cycle: Transport all sickroom linens in a dissolvable laundry bag or a dedicated plastic bin that can be sanitized.
- The Thermal Kill: Wash at a minimum of 60°C (140°F) with a bleach-based or botanical laundry sanitizer. Dry on high heat for at least 45 minutes to ensure total microbial denaturing.
5. The “Sick-Room” Hydration Station
To prevent the need for multiple trips to the kitchen, establish a self-contained hydration and nutrition station.
- The Setup: Use a dedicated electric kettle and a stock of single-use or high-heat-washable cups.
- The Boundary: Any “dirty” dishes must be moved directly from the sickroom into the dishwasher on a Sani-Wash ($71°C$) cycle. Never hand-wash sickroom dishes in a communal sink.
6. Managing “Secondary Biofilms” in Bathrooms
During a gastrointestinal illness, the bathroom becomes the primary site of environmental contamination.
- The Lid-Down Rule: Flushing with the lid up can aerosolize bacteria and viruses up to six feet. The lid must be closed before every flush.
- Chemical Shock: Use an EPA List N disinfectant on the toilet handle, seat, and sink faucet after every use by the ill person.
7. Terminal Cleaning: The “Pathogen Purge”
Once the inhabitant is symptom-free for 24–48 hours, the room must undergo a “Terminal Clean” to reset its biological status.
- The Sequence: Clean from “High to Low” and “Clean to Dirty.” Start with ceiling fans and light fixtures, moving down to walls, and finishing with the floor.
- Focus Zones: Pay specialized attention to “micro-touch” points: window latches, thermostat buttons, and the underside of the bed frame.
8. Hard-Surface Saturation (Dwell Time)
A quick wipe is not disinfection. For terminal cleaning, you must achieve “Saturation.”
- The SOP: Spray surfaces until they are visibly wet. Consult the product label for the Dwell Time (usually 3–10 minutes). The disinfectant must remain wet for the entire duration to physically rupture the viral envelopes.
9. Vaporized Decontamination (Optional/Advanced)
For high-stakes recovery (e.g., after a severe viral outbreak), consider a “Fogging” protocol.
- The Tool: Use a cold fogger with a stabilized hydrogen peroxide solution. This creates a fine mist that reaches into the HVAC ducts and behind furniture—areas that manual wiping cannot reach.
- The Safety: This should only be done in a sealed room with all electronics covered and the HVAC system turned off.
10. The “Clear-to-Entry” Audit
Before returning the room to general household use, perform a final audit.
- The Reset: Replace the HEPA filter in the room’s air purifier. The old filter is now a concentrated source of trapped pathogens and must be discarded as bio-waste.
- The Air Flush: Open the windows for 2 hours post-cleaning to clear any residual chemical vapors and introduce fresh, ionized air.
Conclusion: Resuming Peak Performance
Illness is a temporary disruption, not a permanent failure of your system. By following these clinical SOPs, you demonstrate the ultimate entrepreneurial trait: resilience. You have successfully managed a biological crisis, protected your family, and secured your workspace.
The “Invisible Shield” is once again fully operational.